Showing posts with label DIY. Show all posts

November 02, 2014

Vintage Christmas on a Budget

I know it's slightly (okay, you caught me...VERY) early for Christmas. Don't be mad! After Halloween ends for some reason I'm always in a crazy rush to get our Christmas stuff out. I promise I'll wait at least until after remembrance day.

Christmas has always been a huge thing in my family. Tonnes of parties and many trees to decorate. Every year we would unpack so many decorations, and every year it would be a total thrill to unveil all these wonderful shiny things you only see for a month or so, before they go back into a box once more. 

I seem to have accumulated my own large mass of decorations as well. After living on our own for only four years or so, we have bumped up to seven or eight bins already! I really don't want to get much further than that to be honest. Most of the things we now have are hand-me-downs or family treasures I could never part with. Last year I bought the silver tree of my dreams and every year I make at least one christmas tree craft to add to the collection. Other than that I'm trying to slow it down to a halt.

I definitely didn't start out with everything I have. When I had my first apartment, all I had was a $10 garage sale tree and a package of ornaments I bought at Sears. I wanted to do this post for anyone who is just starting out. Maybe you're in a new apartment on your own for the first time or maybe you just bought your first house. Also for anyone who's on a budget this year. Are you doing the smart thing and pinching your pennies? Absolutely anyone can enjoy a vintage inspired holiday if you know where to look and how to be a little inventive. 
Step One.
If you don't have the cash to shell out for an actual christmas tree, get a small bottle brush tree. It's fairly easy to find vintage ones, but nowadays it's even easier to find them in stores. It seems like every company is recreating this looks right now. You can even go to a craft store and buy what you'll need to make your own! So whatever your budget allows, go get yourself a mini tree or two.
Step Two.
Buying fabric is one of the easiest ways to get festive quickly. You can make tablecloths, throw pillows, a tree skirt (if you have a tree already), anything! You can even cut a doughnut shape out of cardboard and wrap holiday inspired fabric around it for a quick Christmas wreath. I am in love with this new fabric pattern, because it's atomic era inspired and it's versatile enough to work into your home after the holidays. You can use it all year round if you want to!
Step Three.
Get a few vintage ornaments. It's so easy to keep your eye out at garage sales for these during the summer. It may feel very weird to buy Christmas stuff at this time, but this is generally when people are ready to get rid of these types of things. And for great prices too. You might walk away with a set of old Shiny Brite ornaments for 50 cents! Even if you only have a couple, mix them into your existing ornaments and it'll still give them a good vintage effect. And again, if you don't have a tree, don't worry. Put them in a nice bowl on your coffee table or hang them from string from the curtain rod on your windows.
Step Four.
Christmas dinnerware can be pricey, so what do you use for holiday get-togethers or parties you might be hosting? Just use what you have and mix in a few pieces here and there. Investing in some cute Christmas glasses might be a better way to go. This small vintage set of four is a good way to start. They'll be much cheaper and easy to mix in with plain glasses and white dishes. Here's where you could make napkins from the fabric above to set at your table too. (Make sure you wash the fabric beforehand, to prevent the red from bleeding at the party if something spills!) I picked these cute glasses because the back and pink details are not typical of what you might find. If you get pink or black Christmas glasses, you may still be able to use them year round. Gold is also another colour you can use all the time, and it's really easy to find! 
Step Five.
If you have some casserole dishes that have red or green details, use 'em! Even this red and pink floral one can fit into a holiday theme. Even though this would typically be a spring or summer-type pattern, with your table set up, the actual pattern won't matter so much, as the colour palette will. Trust me, it'll blend in just fine! And if you don't have any parties to host, you can use your casserole dish as that "bowl" to put your ornaments in!

I hope this gave you some ideas for this year. I'm sure most of this stuff you can find laying around your home already. Or maybe you can make something similar. I know there are tonnes of crafty people out there!


I'm going to do another blog post on dream Christmas items very soon. Oh yes. Holiday decorations that are just too out of our reach financially. We can all admire them from afar together. 


See ya again soon!


Marissa xo

September 29, 2014

diy plant holder.

I haven't felt very inspired to do any DIY projects lately, but the other day during one of my Value Village trips I found some little bowls that were begging to be turned into some sort of crafty goodness. 

There were four of them for $2.99 and for that price I thought they were worth picking up. They're those kitschy kind of dishes that would've originally had a handle, but they had been removed leaving a hole on either side of each. I automatically thought of hanging them as planters at different heights, for myself or for gifts. And anyway, the pattern on them was way too cute to pass up! Im always looking for ways to add colour and interest in my home, especially in the planter variety.

I've only finished one so far, with the cord being about 30 cm long and it took about 10 to 15 minutes altogether. Super quick!


For this cord I used basic natural coloured hemp string. I cut two long strands for each side. Four in total. I took both strings together and threaded them through one hole. Then tied a tight knot at the exact centre. Next I did a simple braid, but with four strands. (To make it easier I just grouped two strings together and braided them like a three-strand braid. Nothing fancy.) Tie a knot on the end when you've reached your desired length. Repeat these steps on the other side and try to get both as even as possible. You don't want a lopsided hanging planter. No way! 

I'm sure you can think of a cooler way to finish it off when tying it together, but I just tied the top together in two knots to join them and cut off the ends, letting it look rough and unfinished. Hemp string has that unfinished look to it anyway. I think for my next one I will try ribbon in alternating black and white and do a more polished look. I may even do all of them in different colours and styles.

This is a reminder to anyone with seemingly broken dishes. You may be able to repurpose them and give them an interesting new life! What do you have laying around?


Marissa xo

September 08, 2014

Drying Flowers.

 This summer I got these sweet little weed-like flowers at the St. Norbert Farmers Market. I actually don't know what they're called, so if anyone does, please tell me! I loved the simple aesthetic of them and I knew they would look very pretty when dried. I usually hate keeping flowers, because they wilt and die so fast. I prefer having actual plants, but even then I'm not really good at keeping them healthy, let alone alive! 

I thought if I could keep these in a vase for a while and let them dry up, they'd be with me for a long time with little trouble. I had them in an English porcelain vase my dad got me this summer at a garage sale, mixed in with some roses. The combination of deep red and periwinkle blue was so beautiful. The roses died recently, so I decided it was time to start preserving the them now. 

This weekend I got this vase from 1949 at a garage sale for $1. I love the unique asymmetrical shape, so these unconventional flowers fit in nicely. These flowers are kind of like a dandelion once they've gone to seed, but a lot thicker. They're very similar to a thistle, especially when it comes to it's sharp thorns!

Once when I was younger, my grandmother's neighbour told me if you want to keep weed-like flowers, you have to spray them with an aerosol hairspray. This keeps the seeds in place for years, so they don't fall off as they dry up. It acts as a light adhesive. She had giant seeded dandelions in a vase in her cabin and I remember being so interested in them. Of course I tried this and it worked so well! As I was preparing them, some sections were falling off. I had to leave out one whole bulb, because too many had come off. As soon as I sprayed them, they stayed in place. We'll see what the lasting power is like I guess, but I'm hoping for the best!
It felt like a waste to throw out the pretty bits left over from the broken bulb, so I put them in a small retro Ironstone bowl. I plan on adding a few drops of essential oils to give it some fragrance. And voila! Instant potpourri.

I think I got my moneys worth from these babies. As usual Farmers market flowers can be pricey, but I'm not sorry I splurged on these. They're too pretty and I think I'll be able to hang onto them for a while. Going into Fall now, most of my garden has given up, so I'll just take pleasure in how amazing these will look through the rest of the year.


Marissa xo

February 12, 2014

DIY Valentines Day Party Favours

It's so close to Valentines Day and I haven't really talked about it at all yet! I thought I would share something I made a couple years ago, because it was fun to make and a real hit at our work cosmetic party. 
I decided I didn't just want to buy a tub of conversation hearts and plop them down on the table for people to take what they wanted out of it. Usually no one even takes any when they're sitting out like that. So I thought a cuter (and possibly more hygienic way) to give them out was to put them in personal bags! I divided the same amount and colours into each. Then I cut out a heart and used it as a template to make a bunch of heart tags from all types of pink and red paper. I wrote "Happy Valentines Day!" on each one, but of course you could just as easily do this on the computer with a cool font. 

Now to display them. I had a short cardboard box without a lid on hand, so I covered it with floral card stock paper; inside and out. Then for the very top I used a hot glue gun to attach as many pink sparkly beads I had on hand. It really does pay to have a good collection of every craft supply imaginable. For a finishing touch, I happened to have some puffy fabric hearts, so on they went too.

We put it out next to our usual Valentines cupcakes and pink punch. Everyone was so excited they got a little party favour to take home. 

You could make this for any type of party, and with any kind of candy. Even loose teas would be so amazing. Oooh, now I'm dreaming up new ideas!


Marissa xo

January 09, 2014

Top/Popular DIY Tutorials for 2013


Pretty soon I'll have some new projects to share with you, 
but these are my favourites from last year. 


I think out of them all, the kleenex folder was my absolute favourite 
creation. I don't work with felt very much, but I'm certainly going to do 
more with it as soon as possible. 

Have a great day everyone! Stay warm. It's cold outside.
It's a perfect day to stay inside and make something.


Marissa xo


December 18, 2013

Getting Crafty - Handmade Wreath and Mini Mid Century House

Here's a wreath I made this season in some of my down time. It took about an hour to do in total, so if you're thinking about attempting something similar, do it! In no time at all, you'll have a very adorable new holiday decoration!
I started by mapping out pieces of cardboard to construct the walls and roof of my little home. Then I carefully glued it all together piece by piece with my fancy new glue gun. (Somehow my old one disappeared!) 

Also if you're wondering, I left the inside of the house hollow, so it would be lightweight and could later be glued easily onto my wreath. 

I wanted my house to look super crafty and casual. Sort of an imperfect, slightly wonky look you often find on vintage mini Putz-style houses. To achieve this look, for all my fabric and paper pieces I didn't do any measuring. I glued the main wall coloured paper on with my hot glue gun and the rest of the smaller pieces with regular craft glue.
Here's the other side, which I did in a completely different colour pattern! It's a 2-in-1! I liked the idea of turning the wreath around to get a new style if you were bored of the one side, or maybe it wouldn't always go with your other holiday decor. A little change can be good. 

Can you spot the little tree I cut out of shiny metallic green wrapping paper? There's one on each side for some extra detail.

The roof was so much fun to make. I used a mixture of white glitter and some vintage heavier-weight glitter, which is actually more like tiny, clear plastic chips. My Grandma gave it to me from her years of painting and glazing ceramics. She used this one for her christmas village scenes, to look like snow, so I thought this was fitting. I first covered the roof with blank white paper and then drew scallops on the top with my glue gun. While still warm I dipped it in a bowl of my glitter concoction. To create the appearance of icicles, I let the glue drip off the side of the roof a little, and dipped the sides in glitter as well.

To finish off the look I hid the unfinished edges of the house with embroidery thread. 
                               Now all that was left was to glue it onto my wreath I made a few days prior. 
                    All I did was cut a thin square out of cardboard, staple one end of tinsel garland to it and 
                             start wrapping away! Once I got to the end I stapled the other end. Super easy.  
Side one...
and side two!

I packed this one up recently and shipped it out to my Giveaway Winner as part of her prize. For some reason I always end up giving things away more than I keep things for myself. I was planning to make more of these, but it looks like I have run out of time. The next couple of weeks are already scheduled full, so I doubt I'll be making any more mini houses this year. Next year I'll make time to create a whole village!


Happy crafting everyone!


Marissa xo


November 27, 2013

DIY - Crafty Holiday Cone Tree Tutorial with Ribbon and Sequins

After moving into our current home, I knew I wanted to start our own Holiday traditions here. Ones we can keep following up on when we start a family. Growing up we had a lot of holiday traditions. One being getting our Grandparent's tree up reeeaally early in November every year, so they could have their fancy holiday party with all their friends. Even making gingerbread cookies with my mom.
 Mostly I was designated to pressing M&Ms onto their stomachs for buttons. (Back then I wasn't so steady with the icing or that great at baking at all for that matter...)
I have nothing but warm and fond memories of Christmas as a child, and making sure my own family feels that way is very important to me. After lots of moving around and downsizing happening over the years in my family, I have received essentially all of my christmas decorations from my Grandma and Mom. They're a symbol of the past and I love the idea of carrying them on into the future here at my house.
Even though I really covet my extremely old Christmas items that hold a lot of value in my heart, I'm really big on crafting up my own decorations. Probably my favourite holiday things are the ones that were handmade by my family members. (I always tried to figure out how they were made and wished I could do something that amazing!) Now I feel that it is my job to get cracking on some crafty things to fill our space, and inspire the new and future generation of little ones in our life. My tradition? Making at least one new holiday tree every year!


This is what you need:

* sequins (two different colours and sizes.)
* small beads/seed beads
* sewing pins
* sewing ribbon/fabric edging
* scissors
* styrofoam cone tree

Let's get going on this super cute mod-looking tree!
This project requires a bit of coordination (and both hands), but it's very easy.

 STEP 1 Start from the very top, so if you get to the bottom and theres space left, you can slice it off with a knife without compromising your tree. place your ribbon edge down and secure with 1 to 2 pins. Push them right into the styrofoam.

STEP 2 as you wrap your ribbon around the cone, push pins into the cone with your desired sequin pattern. This creates sparkly ornaments on your tree. For mine, I first put on one red seed bead, then a smaller red sequin and then a larger pearlized sequin. I chose to put my sequins on in their concave position, so I would get the most out of their sparkle. Because my ribbon had flowers on it, I used the middle of the flower as a marker of where my pin should go.

STEP 3 Once you get back to where you started, make a cut in your ribbon. Not right at where the ribbons meet. Give a little bit of room, because we have to fold it over. So the line doesn't look messy or unfinished, slightly fold your ribbon over and use 2 pins to secure each side of the very end. 

STEP 4 Repeat steps 1-3 all the way down to the very bottom, or as far as you can go. I did each layer so the edges would join at the same place as the last. That way there is a seam down only one side of the tree. If there's extra styrofoam you can cut it off like I said above, or just leave it how it is. Maybe you'll find another way of finishing yours off, Like by attaching fake glittery snow with glue around the very bottom edge! So cute!
(The diy cone tree to the left was one I made last year inspired by another blogger's holiday post, but I can't find the original blog now! If you know of it please let me know, so I can give credit where deserved. I will post a link when I finally come across it too.)
This is such an easy, no glue/no mess way to get a clean and sleek holiday cone tree. I hope it inspires you to make one or even think up some of your own holiday DIY projects!

Happy crafting!


Marissa xo


November 05, 2013

DIY: Embroidery Thread and Ribbon Spools

I have a crazy amount of craft supplies at my house. Every time I get a gift, I keep the ribbon, paper, cardboard, etc. You never know when these things are going to come in handy. Not only are you recycling by using these things again, ( Let's face it, lots of people just toss packaging in the garbage. How sad.) but you're also saving yourself quite a bit of money. Going out to craft stores or even gift shops for gift wrapping can be so expensive. I say live guilt-free and hoard crafty things to reuse for projects and presents!

That being said, finding places to store these things can get out of hand. I try to keep organized with labelled boxes and files. However, I find as a creative person, these things end up all over the place before I even know what's happening. I like having so much to work with, because it forces me to be inventive and resourceful, but if I come across any ways to help myself stay clutter-free, I am completely ready to try them out.

A week ago, I decided to work on my mess of a sewing box. I have a nice sized, wooden sewing box with tapered legs and fold-out storage. For any normal person it should be enough room. But oh, no. Not for me! My biggest problem is my embroidery thread. Due to lack of  space I threw a bunch in the bottom compartment. It was supposed to be a temporary spot, but months later, here they are still waiting to be untangled and sorted through. Oh dear.

My idea for streamlining this disaster? Handmade cardboard spools. You can buy these at any craft store and they usually come inside packages of embroidery thread as well. Some are plastic and some are paper. It seems silly to go out to buy more if you have the perfect solution in your own home though. Paper and cardboard is EVERYWHERE, so let's use it!
I made these simple spools by creating a paper template and tracing a bunch of thick cardstock paper. One side is white and the other is a baroque-style black and white pattern. I wanted the white side to be the front, so I could label them and write the colour name in a cute handwritten font. Another good idea is to write down the colour number if they have any. That way when you run out you know exactly  which ones you need to stock up on.

I used a pencil to roughly sketch in my font, which I free-handed based on the font, Swung Note. I like crafty looking things, so handwriting the font was something I knew I wanted to do to get a quirky, thrifty effect. I filled it in with a black ink pen and added details and doodles with Copic markers. Starbursts and diamond shapes were a must of course.

Just as a side note, I think putting the colour name on the top would also be a great idea if you have kids. For little ones learning basics like colours and spelling, this would be a nice way to secretly teach them while they play and do crafts. Lessons hidden in play time - always a good plan.
 I really like how these turned out. You can really put any type of thread or ribbon on these, and do any type of design or shape you want. I feel like the possibilities are endless here. I was even thinking of making some with animal faces on the top! Maybe I'll do those sometime soon. I could always use more spools!
What kinds of things do you do to keep your craft items organized?

See you again soon!


Marissa xo

October 10, 2013

DIY - An Easy Fix for Fading Vintage Fonts

I know we've all seen them - glorious retro canisters with little to no label. You can see the indent where the metallic colouring used to sit, but no paint in sight. Seeing this always makes me so sad. Mostly because I want to find one in tact for myself (or for CharmingShopVintage now.) In reality the missing paint is usually attributed to the item being well loved and used often in it's previous home. Sometimes it's neglect or you know, leaving it outside for too long. In a barn perhaps? 
Lustroware Cookie Jar on the right.
I found this gorgeous Yellow Lustroware Cookie Jar at Value Village and after I could't stop thinking about it, and going back weeks later to find it still on the shelf, I brought it home with me. I already have the Kitchen Canister set in White, but my kitchen had some original yellow tiles on it's retro breakfast nook. I felt like I should honour it's original look by bringing in that colour somewhere else in the room. The font was mostly all rubbed off, with just a tiny bit showing here and there. I knew I had to save it. I was keeping it for myself, so why shouldn't I? 

Here's the deal - if you find something you really love, but the font has long since passed, you can potentially fix it! Just remember, if you fix something yourself, it's for you to keep. If you're in the vintage business, never sell things you've altered unless you are open and honest about it. Maybe someone else will appreciate your work on restoring a thing of beauty, but usually collector are interested in vintage things untouched and unchanged in any way. Sometimes it's the flaws that count. So before you start, make sure this is something you want to do!
Getting a good soak before we start doing anything with it. 
All you need is a steady hand and a waterproof marker that is the colour of your original paint. Before you start, do some research and find out what colour font you need, unless you're trying to change the font colour altogether of course. I went to Michaels and got a thin paint pen that was skinny enough to get into the little grooves. Remember, to look at the tip of the marker. You don't want a ballpoint pen marker, because the paint won't transfer onto your vintage surface. Only thin felt marker tips will do.

If you don't have lines or grooves to follow, you'll have to attempt this freehand! Good luck to you. I know you can do it. It's just a matter of time and patience. I suggest looking up your item with it's original font in tact. Leave that photo beside you and carefully copy this onto your item. But of course, you could always create a template to trace with if you're unsure of starting right on your piece. It's up to you and what you feel comfortable with.

Let your vintage item dry completely. You may want to do a few layers of paint. And there you have it. A "new to you" font for a restored by you vintage piece! For upkeep I would suggest hand washing if this is something you use every day. The paint will wear with constant use and can be touched up when needed.

After: The lid
...and the front font. This is with one coat.

I hope you enjoy this mini tutorial. Maybe you have something yourself that you've wanted to try fixing up. Of course if it's something expensive, I would always recommend taking it to a professional restorer. You never want to lose the value of your piece. I got my Cookie Jar for $1, and I really felt that giving it a new life was the right thing to do.

Have a great day everyone! 
Happy thrifting and diy-ing!


Marissa xo

June 24, 2013

Confetti Party! DIY - How I Make My Handmade Confetti

So I'm sure you noticed that if you travel into my shop, it's like a confetti explosion. When photographing my artwork and jewellery, I knew I wanted my shop to be really fun and exciting. I wanted it to be a really bright, positive and joyful place. If I had a physical store, I would want it to be a place everyone would want to go to, just for it's upbeat personality and quirky kindness. Yes, my shop would be kind. I would host a tonne of events, because I am obsessed with themes, so you would expect loads of parties and awesome decorations. There's nothing I like more than making my own decorations. So I translated that into my online Etsy shop, by filling my photos with bursts of confetti and huge, colourful atomic shapes which I made myself. Everything is handmade, and that's how I like it. I wanted everything to be very homemade-looking, crafty and slightly off-kilter all the while remaining true to my overall theme of vintage love of course. 

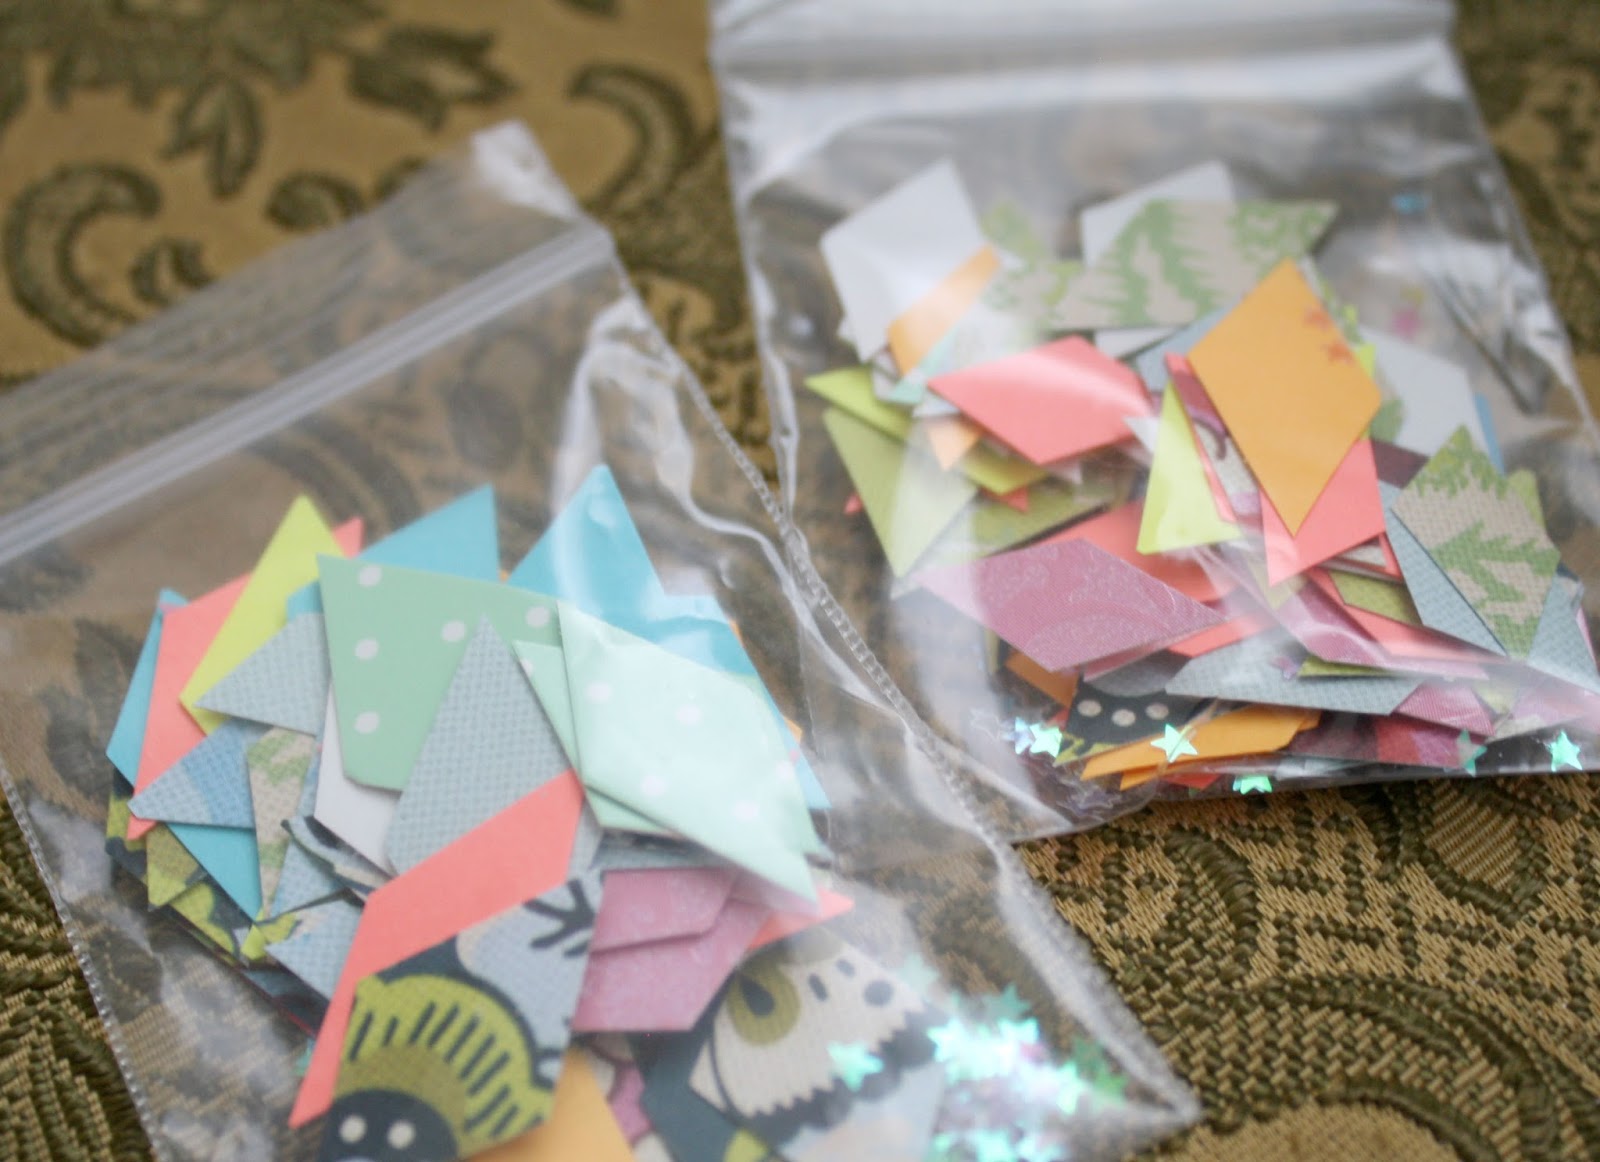
But let's get on to the really good stuff here. after a while of just making confetti for photo props, I decided to venture out and make my own celebratory confetti sachets for a gift with purchase with my Graduation Earring Gift Sets (still available at the moment!) I loved them so much, I decided to make more! Here are some of them, not fully packaged and still in their beginning stages. 
I said this was a DIY, and it still is, my lovelies! I'm going to tell you how I make all this fancy confetti. You need a hole puncher (Preferably one that is not stiff, because you have to punch hundreds of holes. Your hand will be so tired!) and lots of different coloured, patterned and textured paper. Then I sort which colours go together the best, and hole-punch away! I keep a little bowl in my lap, so it all falls in there and stays clean. Once I put it in a container (You can use a little bottle, jar or plastic bag like I did,) I pour in a small amount of glitter to match and make it just that more magical. Do it slow, so it all doesn't dump out and you end up with more glitter than confetti! Yikes! I also hand cut little diamond in mine to correspond with my atomic theme, but any other shape can work. Little hearts are the cutest, and if you don't want to painstakingly cut all those by hand, you don't have to. You can buy paper punchers in all sorts of shapes including hearts at almost any craft store. I'll warn you now, it's not the easiest thing to do. You need a lot of patience, but handmade confetti is so worth the time and effort. It's so beautiful. You can really tell when it's made my hand and when it's manufactured. Totally not the same at all! Plus, you're recycling and reusing your old paper! I keep any packaging, papers, or anything else with a great pattern and hang onto it in a paper drawer until I find cool crafts to do. Sometimes the best things come from scraps you might've otherwise thrown away. 
 As I said before, these pretty little things are not fully packaged yet. You can expect severely adorable packaging. At the moment they are in production for farmers markets which I will announce later for this summer. I thought it would be a cute little extra for my customers to purchase that really sums up my shop as a whole. I am also thinking about adding them to the shop at the end of the summer. I will have them available to purchase as singles and also as custom orders in groupings of your choice. Pretty fancy, right? I love the pale-coloured confetti. It reminds me of a garden wedding. I think I'll have to make some in the future when my boyfriend and I decide to get married! So pretty. I do not mind making this confetti at all. It's fun!

I'm so happy to share my process with you all! 
Have a great day!


Marissa xo
CharmingShop

June 16, 2013

DIY Atomic Era Starburst Garland Decorations

Happy Father's Day everyone! I'm going to be spending the afternoon at my dad's place today. I'm so excited for him to open his presents! I haven't blogged the last two days, but I definitely have something to show you today. I've been thinking more and more about doing craft fairs, and if I'm going to open myself up to that idea, I think I should have the cutest decorations to accent my table. Here's what I made the other day:
I put it up on my window so you could see it a bit better. This is my homemade garland made up of tiny little atomic shapes that I hand cut and strung through a stretchy piece of clear plastic string. That'll give it more bend, so it's easier to stretch around places without breaking. And because the string is clear, it'll mostly go unnoticed, giving my pastel starburst shapes a floating-in-air look. I think these mini versions of my starbursts (The ones I use in the background of my photos,) will look so sweet on any craft table I do in the future. If you want to try this, but using another shape, I recommend cutting all your pieces out first and then stringing them all together at the same time. I mostly used an alternating pattern: starburst, diamond, diamond, diamond, starburst. I also stayed aware of my colour choices, trying not to get the same colour too close together. What do you think of my little decoration? Would you try making one of your own?

Have a great day, and don't forget to spend it with your dad!


Marissa xo
CharmingShop

June 03, 2013

DIY Cleaning Supplies - Keep It Cute!


Happy Monday! The beginning of the week always says, "back to work" for me. Back to business plans and working on my next project, but not only that; back to housework too. The beginning of the week is when I personally get the most inspiration to buckle down and clean. I noticed cleaning supplies can be so boring and everyone has the same ones. It's just routine. You take them out, clean and then put them right back in their hiding place. I guess that's all their good for in reality - just doing their specialized job. No love for cleaning supplies. But with an obsession for cuteness like mine, I couldn't let that be. 
All you need is a pair of craft scissors that are fairly sharp. It can be tough to cut through those scouring pads. I loved the idea of cutting them into darling mini hearts that could sit up near my sink looking romantic and proud, but I cut a few other shapes (circles and squares) just for some variety. You also have to take into account their functionality. They have to be big enough to do some tough scrubbing, so don't cut them too small! If you're wondering about the sizing my biggest square at the top there is about 10cm by 10cm. I'm very happy with how charming these little guys are, and I think I will keep on doing this forever! They have also inspired me to think of some other cleaning supply cuteness I will explore in the future. 

What do you think? Would you try this DIY out?


I bought a huge amount of flowers yesterday, so I'm going outside on this perfect, sunny day to get planting! Hope you all have a lovely day, and that it's bright and beautiful where you live too! 
Bye for now!


Marissa xo
CharmingShop

May 31, 2013

DIY - Bow Making Tutorial

Good morning! Today is Friday and we have a busy day ahead of us here at the house. We have lots of errands to run. You know, just little things here and there to spruce up our place a bit, like new fabric for kitchen curtains and knobs for our kitchen drawers and cabinets. And of course some much needed flowers, because the only ones occupying our yard at the moment are dandelions. But before we get going I wanted to give you a diy. Yay DIY day! I haven't done one in a while.

Here's what you'll need:
*Fabric glue
*jewels
*pins
*sewing needle
*thread
*scissors
*small rings (like jewellery-making jump rings)
*fabric (I used about a 10cm by 5cm piece)
Here's some (not all) of the things you'll need to make your bow.
Turn your fabric upside down and sew the edges on that side. You can pin down the edges to help you.
Fold your fabric accordion style lengthwise to make the bow. Hold it there and sew through the top and bottom (right where my fingers are in this photo!)
Next, flip your bow over and sew on your jump ring. This is going to help you use your bow for different things. Trust me, you'll want it!
Put a large dab of glue right in the centre of your bow (and a little on your jewel of choice too.) Attach your jewel and hold it down for a few seconds just to make sure it sets properly. And make sure it's on there straight while you're at it!
Ta Da! You just made a bow! Easy as pie.
You can use your adorable little bow for anything, really. That little jump ring is there for you to thread ribbon through, attach a hair pin or a keychain or anything else your heart desires! These are just some ideas I had:

*clip onto your shoes
*wear in your hair on a Bobbi pin or on a hair tie
*as a necklace
*tie onto your purse
*use on a keychain
*clip onto your shirt pocket (Seriously so cute, and I will be trying this!)

What would you do with your new bow?


Have a great day!

Marissa xo
CharmingShop